
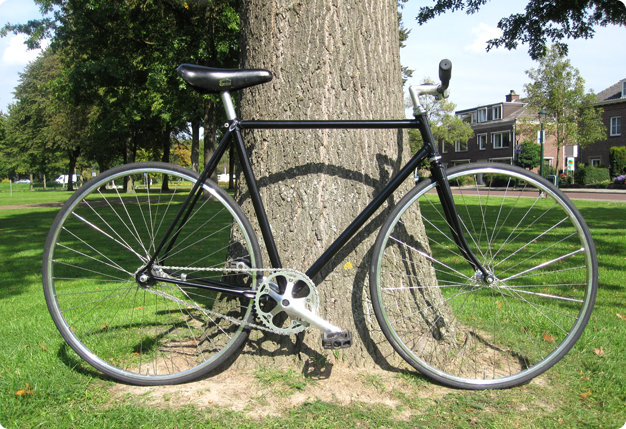
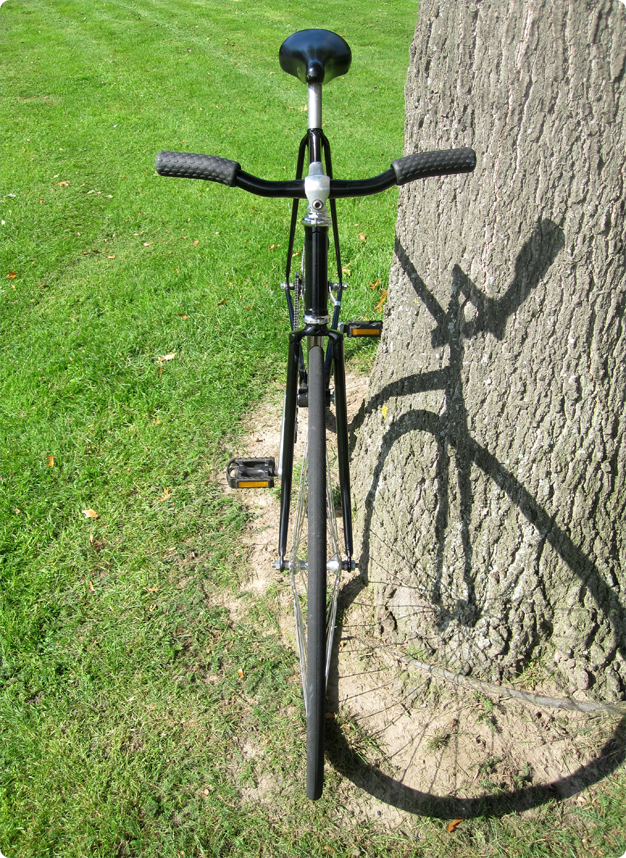
Custom Mechanicalness
For a more fluent and zippy journey across town it was time for something other than the regular old bicycle.
Being influenced by friends with single-speed and fixed-gear bicycles, the obvious choice would be to create a similar contraption.
Both have their respective strengths; the single-speed for braking, the fixed-gear for extreme minimalism. Good brakes or a minimalistic appearance? How about both? Enter the coaster brake. Famous in the Netherlands because of its usage in the old “granny bikes,” it is built into the hub and brakes upon backpedalling. But mind you, it will need some custom mechanical adjustments.
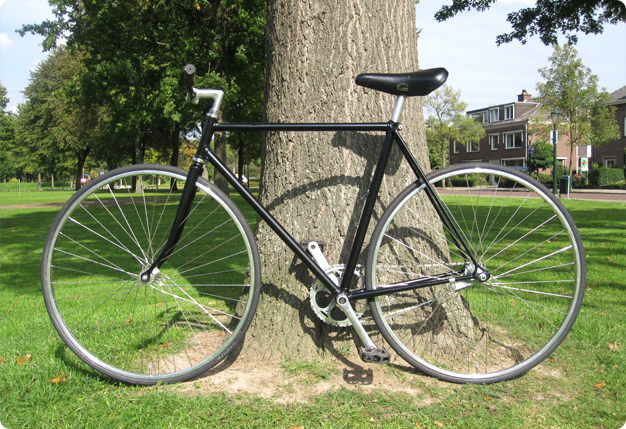
By using a mid-1980s Gazelle Champion Mondial AB frame as a basis, various parts and tools, a layer of powder coating, a custom rear axle, and a lot of aluminum polish, the Granny Tranny was born.
The Bike

The Process
The section below illustrates a picture of the complex and precise work needed to construct the bike to its final form.
Stripping & Filling
Using a brush grinder, sandpaper, and a torch, the frame was stripped from all its paint. The next step involved removing the tabs and guides soldered to the frame. This, combined with some aesthetically less pleasing areas, resulted in some small dents and kinks.
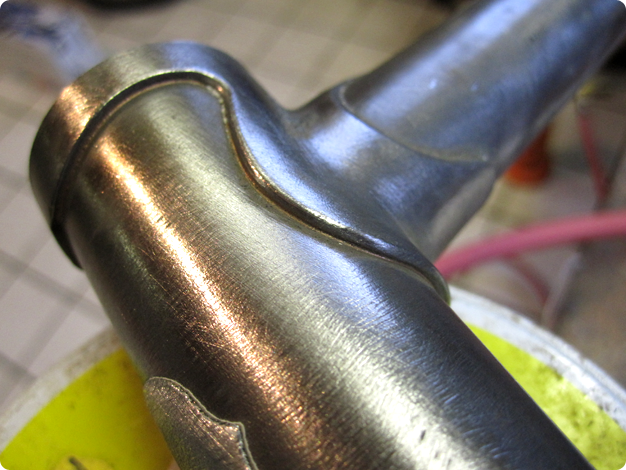
By using silver and a small torch, these imperfect areas were filled to match the curvature of the steel tubing. First, the location was primed with a flux to increase flow and facilitate metal joining by chemically cleaning both metals. The flux is heated with a torch after which the silver is melted into place.
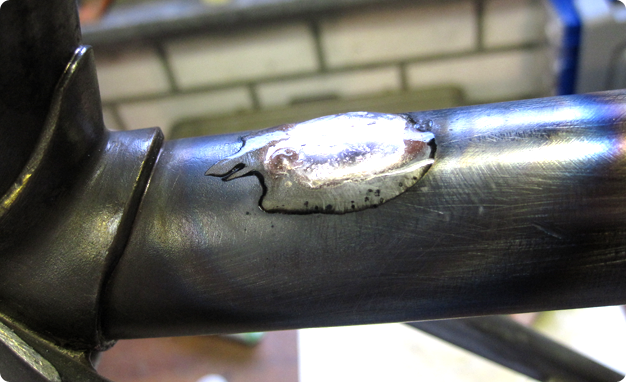
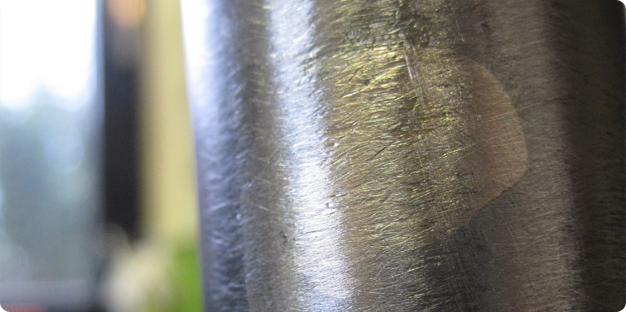
The final step involves a lot of grinding and sanding, since the silver has become quite hard. Below the silver, turned slightly yellow, is seen in place before final sanding and polishing.
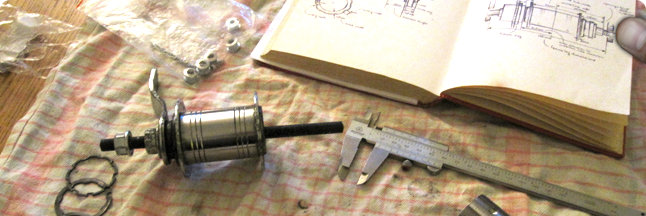
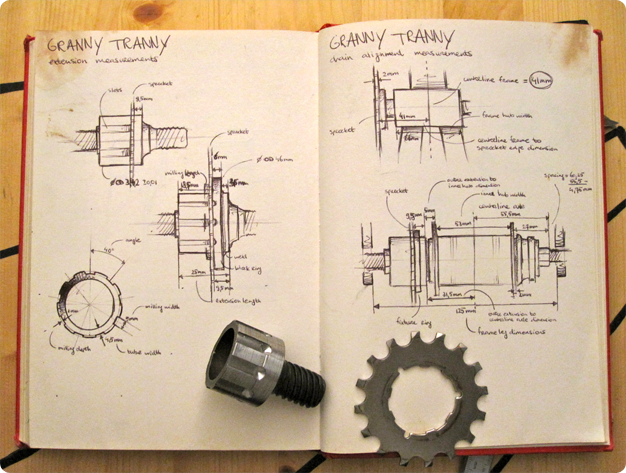
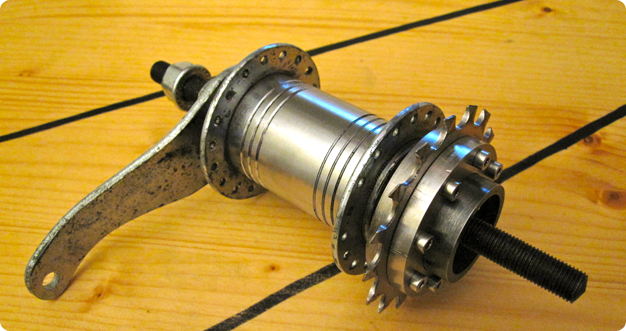
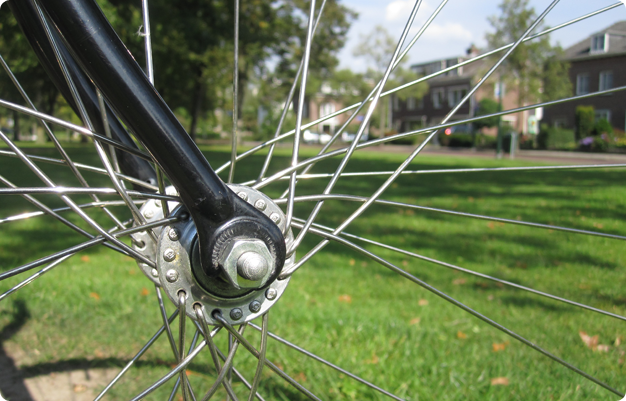
The Custom Rear Axle
By wanting to add a coaster brake from a old dutch ladies bike without having to lace the wheel in an offset pattern, adjustments had to be made. The first step involved aligning all the parts in such a way that the spacing between the center of the rear axle and rear sprocket can be measured. The goal is to have the chain perfectly straight so it does not run off the sprockets.
After all the measurements were done, a design had to be made. The goal was to have a rear axle extension which would fit the rear sprocket, but still allow it to be replaced upon wear.
With the design completed, tooling and machining began. Most of the work was done on a lathe, together with some tricky welding. When all was said and done, the extension was completed.
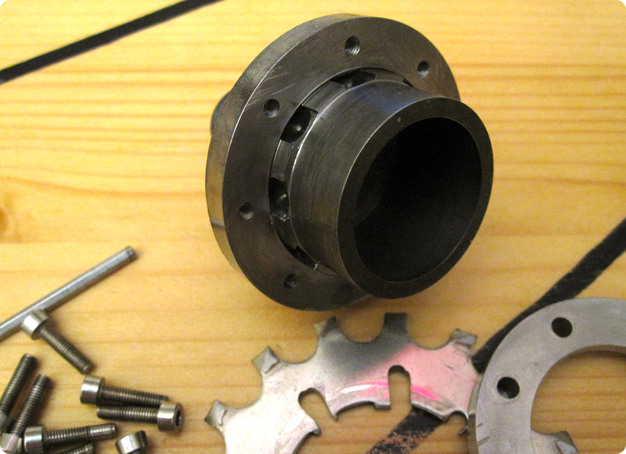
The rear of the extension screws into the axle. The front part houses an inner beveled edge for the ball bearings. The outer surface has nine slots for the sprocket to slide on. The backplate is a stainless ring with eight tapped 3mm holes. The locking ring is also stainless, and is fixated using eight 3mm stainless screws.
Powder Coating
The frame was sandblasted and finally powder coated in a gloss black finish. The black parts, besides the frame, include: the handlebars, grips, seat, foot pegs, and tires.
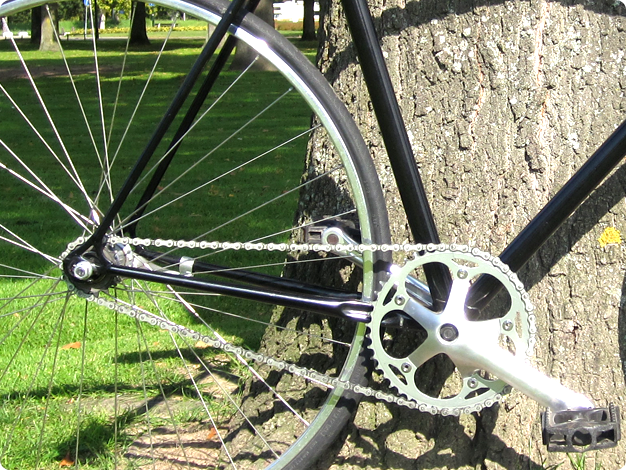
Polishing
To compliment the new layer of powder coat, all the shiny parts where hand-polished. The seat stem, handlebar stem, crank, cups, rims, and finally axles.
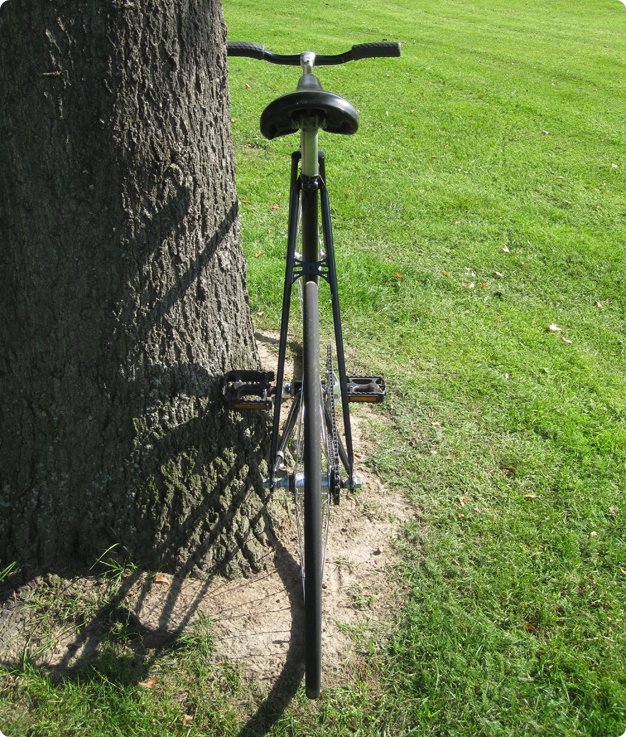
Lacing the Wheels
Instead of lacing the wheels in a standard pattern, something more visually pleasing was found. This spoke pattern uses three leading and three trailing spokes, lacing them over and under each other in three large “fans.” Ultimately resulting in three open spaces for the valve and/or usage of a chain lock.
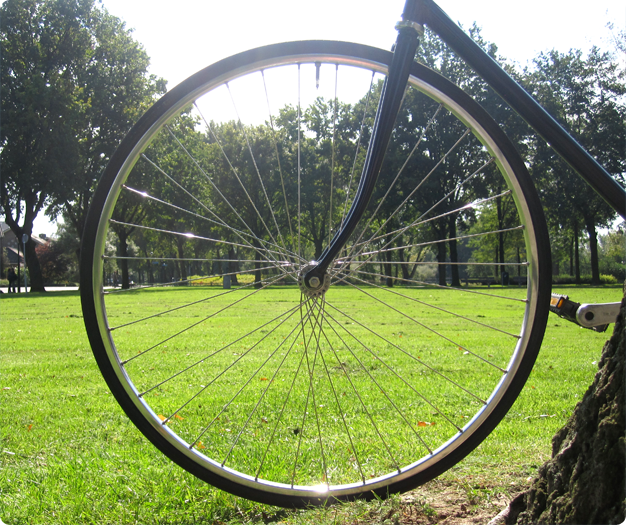
Using strong stainless spokes, this complicated pattern was constructed and trued. It remains to be one of the best-looking spoke patterns seen to date. Instructions on how to construct your own can be found on Baldurdash.
Lighting
The next step is to integrate the lighting into the frame without the use of external wires. Check back later for this upgrade.
Stats
completed in: April, 2011
time spent on project: lots of greasy, scuffed hours
stakeholders: Me, myself and I